Quickie-Monique and Ryan’s Family Room

14 07 2010

Monique contacted me regarding her living room a couple months ago and wanted some fresh ideas since she was tired of the contractor white walls.  Here is her letter:

Dear Sharon: We are looking to change the look of our family room space by updating a few key pieces, but also have several pieces that we would like to keep. The family room is part of the “great room” space in our home, so the look from the family room has to flow into the dining and kitchen as well. I am drawn to warmer tones like wheat, red, and rich chocolates, but I am also open to other color choices and prefer wood tones in the espresso family. The style of furniture that I like tends to be cleaner lines, but I also don’t like anything that is too modern. I love texture and details, whether that be an interesting button on a pillow to a distressed finish on a candleholder and also love touches of nature. I tend to like styles that are contemporary, French, or slightly traditional in feel.  The main piece of furniture we want to change is a sectional. We have two small dogs and two cats, so we need something that is durable and easy to keep clean.  We have a square coffee table and console table that have beveled glass that we like to keep. We also own two ladder back shelving units that flank our fireplace that are in an espresso stain. Other than these pieces, we are looking to add or change the rest of the space….wall art, decorative accessories, pillows, throws, table lighting, and possibly a rug.
One of the biggest choices we also need to make is wall color. Due to the layout of our home, the color we put in this space will wrap through most of our main level and will possibly even wrap up the stairway onto the second level. It is so tough to find a neutral and warm tone that will work in many areas!  Can you tell that we need a lot of help?!  The space is 14’x15′ and has one large window along a North facing window.


Monique certainly knows how to accessorize a room, but I agree that the walls could use a little color and since they are replacing the sofa a few other additions might be nice to spruce things up a bit.  Here is their material board:
And the material board breakdown:
  1. For the color palette, I have warmed up the walls a bit with Behr/ Pale Wheat #UL160-7 for most of the walls.  If you are interested in adding an accent wall my suggestion would be the wall with the windows that spreads between the family room and kitchen.  It will make an impact as you enter the house and has two inside corners for it to die into.  My suggestion for this color would be Behr/ Cacao #UL160-22.  Since you already have so many accents in red that I adore, I thought I would add complementary plum and orange accents to the room to balance all the dark furniture.
  2. The sofa sectional is a customized design from Smith Brothers and is a medium chocolate brown.  For your layout, you should opt for a RAF sofa, corner chair and LAF loveseat.
  3. Since I changed out most of the metal finishes in the room, I wanted to give you an option for changing out your ceiling fan to a bronzed finish.  This also includes a light kit since while we were talking you mentioned low lighting in the room.  You might also consider a dimmer on the switch so that you could choose your lighting level accordingly.
  4. The pillows for the sofa are semi-custom made from a vendor on Etsy.  My suggestion for each corner would be an ivory silk pillow with metal accents with a plum silk pillow with a self fabric accent in front of the ivory one.  On either corner with arms include the paisley pillow for a pop of color and fun.
  5. Since the curtains go on the accent wall, I figured the wheat color would complement the room, carpet and dark furniture.  I would put a decorative panel on each side of the long window and do a wide panel on the slider. I think bronze hardware would look great with the golden tones in the room.  Something like this would look spectacular.
  6. I selected an area rug for your dining room that would complement the family room in hopes that it would blend the rooms together well.
  7. This lamp is selected for behind the chair as a reading lamp.  With it’s overhang it should provide ample task lighting while adding a decorative touch to the room.
  8. You currently have a lamp on the console table and I thought an updated version to match the other metals in the room would add a touch of sophistication.  This simple lamp is elegant and will look great with both your dining room and your family room decors since it splits the difference between the rooms.
  9. This chair had me going back and forth between a decorative piece and a comfy version.  I decided you had plenty of soft furniture with the sectional and to that I would add some interest with this piece.  The back of this chair is certainly a statement and will look great next to your ladder bookshelves.  It combines the paisley effect and the more organic botanicals found in both the area rug and artwork.  I would suggest having the seat upholstered in the “Date” fabric.
  10. Lastly, I took a note from your current photographic artwork and selected something with a similar look, but incorporated all of our colors to help it blend with the room.

Since I adore all of the accessories throughout the space currently, I haven’t added anything new.  My only suggestion is to maybe incorporate in a few more plum accents to complement the red one just to finalize things.  So there you have a slightly traditional space that is oozing with sophistication.  Can’t wait to see how the room looks when you finish with it!  If you want to get a Quickie of your own, click here.


Leather, Anyone?

5 07 2010

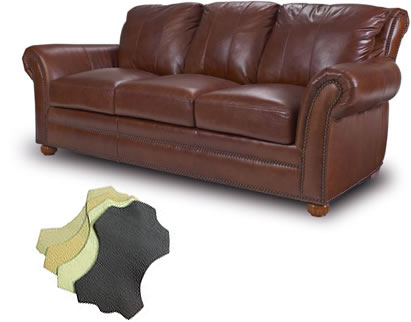
Recently, a question came up at a dinner party about leather furniture and how to know from the description that you are getting quality leather goods.  So, I thought I would give a short rundown on each of the different types of leather that furniture comes in so your next experience in selecting leather goods might be a positive one.

First off, Full-Grain Leather.  Hands down this is the highest quality leather available on the market today.  This refers to the upper  section of the hide that previously contained the epidermis and hair, but were removed from the hide/skin.  These are hides that have not been sanded, buffed, or snuffed (as opposed to top-grain or corrected leather) to remove imperfections (or natural marks) on the surface of the hide. The grain remains completely intact which leads to strength and durability. The grain also has breathability, resulting in less moisture from prolonged contact. Rather than wearing out, it will develop a patina over time.

Next we have Top-Grain Leather, which is a misnomer as it gives the false impression that it is “top” quality.  This is the second-highest quality as it’s surface has been sanded and refinished.  As a result, it has a colder, plastic feel, less breathability and will not develop a natural patina.  However, it does have 2 advantages over full grain leather: it is typically less expensive and has a greater resistance to stains.  This finish also has a more “regulated” feel, so if you demand perfection in the finish (no blemishes, etc.) this would be the way to achieve that look.

Split-Grain Leather is leather created from the fibrous part of the hide.  During the splitting operation, the top grain and drop split are separated.  Split leather then has an artificial layer applied to the surface of the split and is embossed with a leather grain (known as Bycast leather). Splits are also used to create suede.

Bycast Leather, is a split leather with a layer of polyurethane applied to the surface and then embossed. Bycast was originally made for the shoe industry, but recently was adopted by the furniture industry. Most of the bycast used today is very strong and durable product. The result is a slightly stiffer product that is cheaper than top grain leather but has a much more consistent texture and is easier to clean and maintain.

Lastly, Bonded Leather, or “reconstituted Leather”, is composed of 90% to 100% leather fibers (often scrap from leather tanneries or leather workshops) bonded together with latex binders to create a look and feel similar to that of leather at a fraction of the cost.  Bonded leather upholstery is a vinyl upholstery that contains about 17% leather fiber in its backing material thus can be called leather by manufacturers. The vinyl is stamped to give it a leather-like texture. Bonded leather upholstery is durable and its manufacturing process is more environmentally-friendly than leather production so if you are trying to be environmentally friendly this might be an option for you.

Raw Hide International

Just as a point of reference as well, always be aware when you are purchasing leather goods that not all leather is created equally.  Since it is a natural product that has been seen by all elements here are some examples of what flaws to look for.  Hopefully this will provide you some helpful insight during your next shopping trip!


Tool Kit for Home Repair

26 03 2010

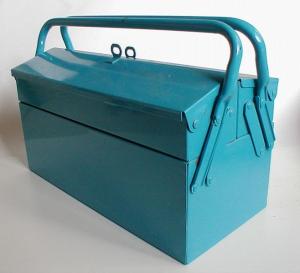
Your home is most likely your largest investment.  So not only do you want to stay on top of keeping it updated and looking great, you probably want to keep it running great too.  The secret that most specialists don’t want you to know is that it is easy to fix most common problems.  Usually it consists of taking something apart, replacing the defective part and putting it back together.  So fairly easy, and since we aren’t cavemen anymore, it gets even easier if you have the right tools.  So here is a rundown of what I would suggest for you to keep in a handy little toolbox or handyman bag under your sink.

Pliers:

  • Large slip-joint
  • Long-nose
  • Needlenose

Multi-bit Ratchet Screwdriver

Hammer:

  • Either a Ball Pein Hammer or a Heavy Claw Hammer
  • Mallet

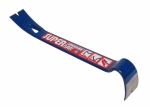
Superbar-I wanted to include a picture of this because it has turned into one of my favorite tools to have since it can basically do anything you want it to do from taking out nails, removing trim, banging on something, etc.

Adjustable Wrench: Both Large and Small

Putty Knife

Awl-since it has a sharp metal point with a handle it is an ideal tool when you need something sharp

Hex Keys/Allen Wrenches (These are what you use to put IKEA furniture together so a set with handles really makes this job smooth)

Combination Square -an all in one measuring tool for hanging anything that includes a level, protractor and ruler

Tape Measure

2 Pipe Wrenches-when you take apart pipe you will need one for each segment you are working with at a time

Power Drill and Bit Set -I personally stay away from girly tools because often times the makers don’t give it the same amount of power as the men’s version.  I am also a much bigger fan of the corded variety as the power often dwindles on the cordless when I am less than halfway through a job and I’m not big on taking breaks.

Odds and Ends:

  • Assorted Fasteners Kit (includes hooks and screws for hanging pictures)
  • Picture Hanging Wire
  • WD-40
  • Liquid Cement
  • Stud Finder (You always need one of these for when the job just gets too big-I kid)
  • C-Clamp
  • Rubber Jar Opener
  • Magnet
  • Gloves (I like both a set for demolition and some latex for things like staining.)
  • Safety Goggles

Funny story, growing up my dad bought us tools for Christmas’ and such, so when I moved out I had a pretty impressive tool collection.  When we started working on the house a friend came over to help and he was surprised by how many tools John had.  When John admitted the tools were mine, I thought Lewis was going to fall off his ladder he was so shocked!!

Anyway, I hope this helps in starting to build your tool library.  Tools can be pretty pricy to go out and get right away so my best suggestion would be start building your supply slowly.  Maybe pick up a tool every time you go to the store for other purchases.  Other ideas are to pick up tools on the cheap at either garage sales, estate sales or even your local thrift store.  I just picked up a screwdriver (broke the end off of mine on the last project) at my local salvation army store yesterday for .75 cents.  And if you absolutely want to buy new and for a little less check out the deals at Harbor Freight.  When we were working on our house this was the go to place for us.


Making our 4 Bedroom into a 3-who says it won’t add value?!

12 03 2010

Up until now, we have been just dipping our big toes into our new home remodel testing out the water, but in the next project that was all about to change.  We decided it was lame just dipping our toes into the remodeling, so we did a cannon ball from the high dive and got it over with (metaphorically)…we tore down a wall.  A concern of mine in the beginning was that the master bedroom only kind of had a closet.  It was located in our bathroom which is shared jointly with the rest of the bedrooms on the upper level.  Knowing me and my shopping habit, this was just not going to be enough space.  So our decision to change the little room off the master that was formerly called “the nursery” seemed ideal.  Here was our thought process when everyone under the sun asked us ‘is tearing out a room really a value added move?’

A. It’s a townhome, why does it really  need 4 rooms? and B. What exactly do you do with a blank x blank room.

It was way too small for a guest room (unless you want to stay on bunk beds and even then would have been REALLY tight) and basically too small for an office.  A question I ask is: what do you do with a room that has been designated as a nursery during the years you don’t have someone to fill it?  We also had 2 other rooms that would act as our guest room and an office so making it our closet was an ideal move for us.  I am a firm believer in making your home for yourself and how you need the home to function for you, but I do always try to be mindful of what future buyers will expect as well.

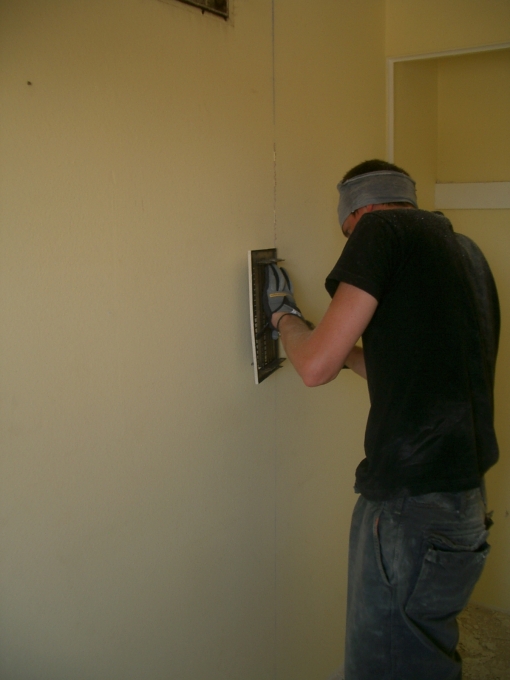
First, we started out by measuring and scoring the drywall so we would have a clean line to work with later on the remaining part of the wall.  Since we were planning on mounting our television to the stub wall that contained the wardrobes on the back side we measured out the length of the wall to fit our television.  Above is Ian (a good friend of ours that helped us during our remodel on the weekends since he was in LA working for an architecture firm that summer) scoring our gyp. board.  Notice he is using a vent cover as his straight edge?!  Sometime you have to use whatcha got at the moment.

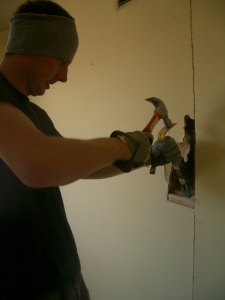
Next was the big moment (well for us) where there is no turning back…hammers in.

Now had we realized that a couple years down the road I would be showing this picture to lots of people we may have made an attempt to look a little less grubby, but we didn’t.  So here I am with my ‘working on the new house uniform’ that I wore daily and John has on his ‘cut off the sleeve of my old t-shirt hair tie’.  I must say that this moment truly felt like Sarah Jessica Parker walking into her walk-in closet from Mr. Big during the Sex in the City movie.  That moment just made it all feel like this was REALLY happening.  If you are not sure what I am referencing you can check it out here.

So we started to make progress on the removal of the wall board:

So while we are swinging away hammers at our end, since there is no rules to pounding out drywall.  Ian is working away at the meticulous job of taking out gypsum board next to the score line.

And what do we do once our holes get a bit bigger… we had to pose with our handy work.  Maybe its just me but it seems like your house  just isn’t a home till you put a hammer through one of its walls.

So we finished the wall on ‘the nursery’ side and this is what it looked like.Before I go any further, as we tore into the wall both Ian and I, with degrees in architecture for him and interior design for me, did a double take on this diagonal 2×4.  We both looked at it, scratched our heads, asked the question that we had so thoughtfully worked out before taking on this endeavor, that this wasn’t a load bearing wall.  But when we saw that diagonal brace we hoped we had made the correct assessment.  We had.  This was just a method the builder used to “shore up” the wall as my well versed architect friend verified for us.  Anyway, on to the other side of the wall.  This time John thoughtfully measured a line to score the bedroom side, while Ian got started punching a hole through the wall.

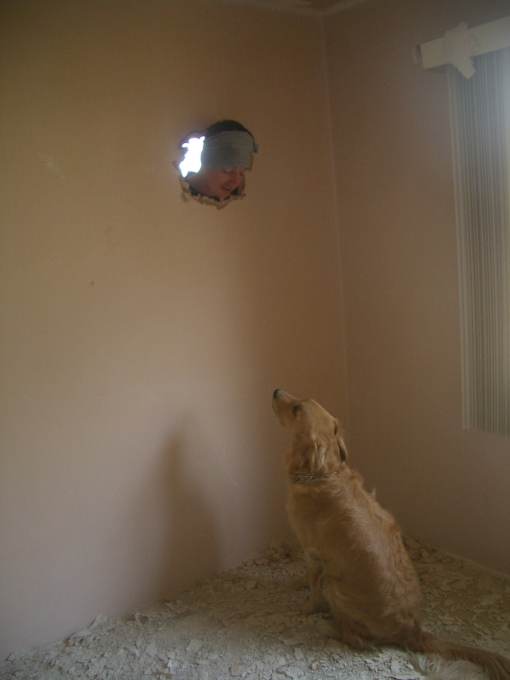
Now this picture conjure up a couple questions in my mind.  Why would I ever allow my beautiful golden dog to be subjected to acoustic ceiling scraped leftovers that she laid in for days (i am certain digesting some of it into her system) and who ever came up with the phrase “designer vertical blinds?!”  Anyway, this is one of my favorite pictures from all of our days working in our little abode.

So we labored and labored, what am I saying, this was the best part of the whole thing tearing stuff out.  And we came up with this.

And finally this…

And today this is how it looks:

We patched the drywall about a week later after we installed the floating ceiling I told you about in this post.  So now that the wall was down we patched in the door since how many doors do you need to one room and it would have interfered with our wardrobes.

So above is the before we patched it, and under is the much, much later after the whole project is done of that same wall.  You would never know that there had previously been a door there.  Plenty of things have changes between then and now but we will go over all that in the weeks to come.

Now, I wish I had documented the building of the wardrobes that complete our closet addition, but I didn’t.  I think by the time we moved into our new place I was pretty much sick of working on the house and really didn’t want to document the journey as closely as I had been.  So between moving in and the next year or so of our lives things didn’t get photographed nearly as complete as the first several projects.  Next posting I do on our house will be about the painting.  And trust me when I say…we did a ton of it!!


Design Quickie Inspiration-Facets (Architectural)

10 03 2010

Today’s quickie is inspired by an architectural trend that I have seen popping up.  Literally.  Facets are an incredibly dynamic look that come to life either 3 dimensionally or create a look as if they were 3 dimensional.  A facet is defined as a divided plane surface (think diamond ring.)  Here is the inspiration trend we are following:

So for today’s quickie I have filled a design board with a complete dining room look with all things faceted.  I wanted to challenge myself since the style we are following tends to be more modern in direction, I have decided to take it in a more traditional classic style for our quickie.

And here is our material board:

Now for the rundown of what everything is:

  1. For our color palette, since we are moving in a decidedly more traditional way, a subtle blue would be nice for the walls.  My suggestion would be Dunn Edwards/ #DE5799 Snow Lodge.  It has a nice soft hue to pick up colors in the artwork without replicating the color and will look stunning with the wood finish.  I think it would be nice to trim the room in a nice, clean off-white color.  Ralph Lauren Paint/ #UL45 Modern Studio, is a nice creamy neutral that will look fantastic with all the rooms’ white accessories.
  2. These extraordinary lamps will add sparkle to the room with their antique mirror faceted bases.  The height is a bit shorter than a typical buffet lamp but since the buffet sits higher than normal itself the overall appearance will still work perfectly.
  3. Speaking of the buffet, this piece is unusual since it offers facets on not only the wooden drawer fronts but has fluted glass as well.  Its very traditional structure is brought new again with more modern elements.
  4. The faceted ceramic tall vase has a beautiful design and will look great next to the buffet.  We accented it with some bright yellow f aux flowers that pick up an accent color in the artwork.
  5. The accessories for the room should be in a pure white or chrome metal and pick up hues of bright yellow and soft lemongrass green.  As you can see in the napkin rings we have picked a simple, clean lined style with a soft green napkin as a suggestion of a direction to move in.
  6. This marvelous pendant light fixture is perfect for our space.  It has a full on faceted look while supporting the white accessories throughout the space.  Even though Le Klint fixtures have been around for ages they still can give a modern twist thus creating a classic, timeless style.
  7. This pedestal bowl is just a start for the table scape.  With the traditional design of the bowl it is updated  by adding the faceted edges.  It will look great with flowers, Christmas ornaments, or just about anything else you can think of to collect inside the bowl.
  8. This table was a steal!!  Originally $799 I found it marked down to an astonishing $399-half price.  Can you believe it?!  This is the perfect find as it has a very traditional but simple design aesthetic and offers the same facets that the buffet has.  The detail of the squares on the top is just icing on the cake in making this table perfect for our space.
  9. These wonderful side chairs will look amazing next to each other (two on each side of the table.)  The style of the chair is unique and has a wonderful nail head trim around the seat and back.
  10. These fabulous armchairs for the ends of the table will help to ground the look.  The oversized nail head trim really steps up the design of these chairs.
  11. The artist offers many faceted prints to choose from, but this one inspired the color palette for the room.  The artwork comes as a limited edition print that is one of 50 total that have been created by the artist.
  12. This is just a little fun accessory I came across while pulling everything together and thought it would look great on the buffet next to a lamp.
  13. Finally, these crystal cut votive candle holders will look great perched around the pedestal bowl on the table scape.  Spread them down the table for an elegant dinner and you will have a spectacular space to entertain.

I hope that you have fallen for the facets as much as I have in this process.  I look forward to hearing your feedback on whether or not you like the more traditional design choices offered in this space.  If you want to pick up a quickie of your own, click here to get started.